If you’re planning an event, you want to make sure it’s memorable and engaging for your attendees. One way to do this is by setting up a Twitter wall. A Twitter wall is a live display of tweets that are curated based on a specific hashtag or handle.
By displaying tweets from attendees, speakers, and sponsors in real-time, you can create a more interactive and engaging experience for your audience.
In this article, we’ll walk you through the steps of creating a Twitter wall for your event.
Step 1: Choose Your Hashtag
The first step in setting up a Twitter wall is choosing a hashtag for your event. Make sure it’s unique, memorable, and relevant to your brand or event. You can use tools like Hashtagify or RiteTag to research hashtags and see which ones are the most popular or relevant to your industry.
Step 2: Choose Your Twitter Wall Tool
There are several tools available for creating a Twitter wall, including Idukki, Walls.io, and Tagboard. Each tool has its own unique features and pricing, so make sure to research each one and choose the one that best fits your needs and budget.
Step 3: Customize Your Twitter Wall
Once you’ve chosen your tool, you can start customizing your Twitter wall. You can choose the design and layout, font, and color scheme to match your brand or event. You can also choose to display specific types of tweets, such as those from speakers or sponsors, or set up filters to remove any inappropriate or irrelevant content.
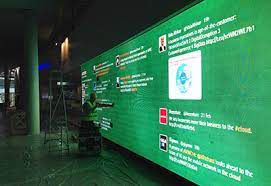
Step 4: Display Your Twitter Wall
Once you’ve customized your Twitter wall, it’s time to display it at your event. You can set up a large screen or monitor to display the wall, or project it onto a wall or screen. Make sure it’s in a visible location where attendees can easily see and interact with it.
Step 5: Engage with Attendees
One of the benefits of a Twitter wall is that it allows attendees to engage with your event in real-time. Encourage attendees to use your hashtag and share their experiences on social media. You can also display tweets from attendees on the wall to create a sense of community and encourage more engagement.
Step 6: Analyze Your Results
After your event is over, it’s important to analyze the results of your Twitter wall. You can use analytics tools to track the number of tweets, reach, and engagement, as well as identify any trends or insights. This information can help you improve your future events and make the most out of your Twitter wall.
In conclusion, a Twitter wall is a powerful tool for creating an engaging and interactive experience for your event attendees. By following these steps and making the most out of your Twitter wall, you can boost engagement, increase brand awareness, and create a more memorable event for everyone involved.
